Table of Contents
How to deploy Hyper-V CI in one hour or less
This guide assumes that you already have a MaaS environment set up and working with windows images uploaded. If you do not, head over to How to deploy MAAS, finish that and come back when you are finished.
Prerequisites:
- MaaS set up
- At least 5 nodes registered in MaaS
- MaaS API Key (found at http://MAAS_IP/MAAS/account/prefs/)
- Gerrit account
- Upstream port 29418 must be accessible
- A VLAN range large enough to allow tempests tests to run successfully. This vlan range needs to be allocated before the job starts, and it needs not to conflict with any other job.
- A list of MAC addresses that represent data-ports and external-ports. This is how the deployer correctly configures networking on the nodes.
We are going to go through all the steps required to stand up a new Hyper-V CI. At the end of this guide, you should have:
- one Zuul server
- one jenkins server configured to connect to zuul
- one active directory controller
- various devstack and hyper-v nodes deployed by jenkins jobs
What's missing:
- High availability
- Log collection
There is some level of manual configuration currently required, which will be automated in the future (relation between jenkins and zuul to take care of configuring the gearman connection for example).
Deploying juju
First things first. We need a working juju environment to start things off.
We should strive to use the latest stable juju when deploying a new CI environment. However, if any blocking bugs arise, a bug report should be filed against juju-core. Blocking bugs are usually fixed and backported to stable promptly.
- adding the juju stable ppa:
sudo apt-add-repository -y ppa:juju/stable
sudo apt-get update && sudo apt-get install -y juju-core
sudo apt-get install -y juju-deployer
- create a juju config boilerplate
juju init
- edit the boilerplate located at $HOME/.juju/environments.yaml and set the following configuration:
maas:
      type: maas
      maas-server: 'http://<ip>/MAAS/'
      maas-oauth: '<Key you got from http://<MAAS IP>/MAAS/account/prefs/>'
      bootstrap-timeout: 1800
      enable-os-refresh-update: true
      enable-os-upgrade: true
- switch to MaaS environment
juju switch maas
- bootstrap juju
juju bootstrap --debug --show-log
![]() If you have any troubles bootstrapping and you need to retry, you have to destroy the environment and run the above command again:
If you have any troubles bootstrapping and you need to retry, you have to destroy the environment and run the above command again:
juju destroy-environment maas --force -y
- check your environment
juju status --format tabular
You should see something like:
ubuntu@ubuntu-maas:~$ juju status --format tabular
[Services]
NAME       STATUS EXPOSED CHARM

[Units]
ID      STATE VERSION MACHINE PORTS PUBLIC-ADDRESS

[Machines]
ID         STATE   VERSION DNS               INS-ID                                                         SERIES HARDWARE
0          started 1.24.3  likable-rock.maas /MAAS/api/1.0/nodes/node-ad58279e-1aab-11e5-bdef-d8d385e3761a/ trusty arch=amd64 cpu-cores=16 mem=32768M
Deploying the infrastructure
Next, we need to deploy jenkins, zuul and active-directory. Jenkins charm exists upstream, and we will use it. The zuul charm is custom made for this CI, and not yet uploaded to the charm store so we need to clone it our github repository.
So lets clone necessary charms locally:
sudo apt-get install -y git
mkdir -p ~/charms/trusty && cd ~/charms/trusty
git clone https://github.com/cloudbase/zuul-charm.git zuul
mkdir -p ~/charms/win2012r2 && cd ~/charms/win2012r2
git clone git@bitbucket.org:cloudbase/active-directory-charm.git active-directory
cd active-directory
./download-juju-powershell-modules.sh
This bit of the CI rarely changes, so once deployed we will probably not touch it to often.
Now lets deploy the charms. Navigate to the charms folder:
cd ~/charms
and create a file called infra.yaml with the following content (edit where necesarry):
maas:
services:
  jenkins:
    num_units: 1
    charm: cs:trusty/jenkins
    options:
      password: SuperSecretPassword
      plugins: "gearman-plugin throttle-concurrents parameterized-trigger"
  zuul:
    num_units: 1
    charm: local:trusty/zuul
    branch: git@github.com:cloudbase/zuul-charm.git
    options:
      username: hyper-v-ci
      ssh-key: |
        -----BEGIN RSA PRIVATE KEY-----
        <YOUR KEY GOES HERE>
        -----END RSA PRIVATE KEY-----
      git-user-email: "microsoft_hyper-v_ci@microsoft.com"
      git-user-name: "hyper-v-ci"
  active-directory:
    num_units: 1
    charm: local:win2012r2/active-directory
    branch: git@bitbucket.org:cloudbase/active-directory-charm.git
    options:
      domain-name: "hyperv-ci.local"
      password: "Nob0dyC@nGuessThisAm@zingPassw0rd^"
Using that file we will now deploy our charms. Take note, charms will be configured to use the information you provide:
juju-deployer -L -S -c filename.yaml
At the end you should have something like this:
$ juju status --format tabular
[Services]
NAME             STATUS  EXPOSED CHARM
active-directory unknown false   local:win2012r2/active-directory-1
jenkins          unknown false   cs:trusty/jenkins-4
zuul             unknown false   local:trusty/zuul-0

[Units]
ID                 WORKLOAD-STATE AGENT-STATE VERSION MACHINE PORTS                   PUBLIC-ADDRESS          MESSAGE
active-directory/0 unknown        idle        1.24.3  1       1-65535/tcp,1-65535/udp another-month.maas
jenkins/0          unknown        idle        1.24.3  2       8080/tcp                stunning-digestion.maas
zuul/0             unknown        idle        1.24.3  3                               exalted-nerve.maas

[Machines]
ID         STATE   VERSION DNS                     INS-ID                                                         SERIES    HARDWARE
0          started 1.24.3  likable-rock.maas       /MAAS/api/1.0/nodes/node-ad58279e-1aab-11e5-bdef-d8d385e3761a/ trusty    arch=amd64 cpu-cores=16 mem=32768M
1          started 1.24.3  another-month.maas      /MAAS/api/1.0/nodes/node-b092b82a-1aab-11e5-b839-d8d385e3761a/ win2012r2 arch=amd64 cpu-cores=16 mem=32768M
2          started 1.24.3  stunning-digestion.maas /MAAS/api/1.0/nodes/node-b1c505a4-1aab-11e5-bdef-d8d385e3761a/ trusty    arch=amd64 cpu-cores=16 mem=32768M
3          started 1.24.3  exalted-nerve.maas      /MAAS/api/1.0/nodes/node-b2499210-1aab-11e5-b839-d8d385e3761a/ trusty    arch=amd64 cpu-cores=16 mem=32768M
The zuul charm sets up most of what we need automatically. However, given that jenkins allows the user to create arbitrary jobs, the layout.yaml may not fit with the job names you created. So after creating the jenkins jobs (not yet automated), you will need to tweak the layout.yaml for zuul.
Preparing Jenkins
Install prerequisites
At this point, jenkins should be set up, including all the required plugins. We still need to clone the tools that will deploy the actual tests. This will also be automated in the future. There are a few areas that the upstream charm does not cover, which warrants a fork. For now, lets do it manually:
juju ssh jenkins/0
you will automatically be logged in with the ubuntu user. This user has sudo rights. Lets set up some prerequisites:
sudo apt-add-repository -y ppa:juju/stable
sudo apt-get update
sudo apt-get -y install juju-deployer juju-core python-gevent python-jujuclient git
sudo -u jenkins -i
mkdir ~/scripts && cd ~/scripts
git clone https://github.com/cloudbase/common-ci.git
cd common-ci && git checkout redmondridge

mkdir -p ~/charms/trusty && cd ~/charms/trusty
git clone https://github.com/cloudbase/devstack-charm.git devstack

mkdir -p ~/charms/win2012r2 && cd ~/charms/win2012r2
git clone git@bitbucket.org:cloudbase/active-directory-charm.git active-directory
cd active-directory
./download-juju-powershell-modules.sh

mkdir -p ~/charms/win2012hvr2 && cd ~/charms/win2012hvr2
git clone https://github.com/cloudbase/hyperv-charm.git hyper-v-ci

exit
sudo ln -s /var/lib/jenkins/scripts/common-ci/deployer/deployer.py /usr/bin/ci-deployer
exit
We need to copy over the juju environment to the jenkins server so that it can deploy juju charms:
ADDRESS=$(juju run --unit jenkins/0 "unit-get public-address")
scp -i ~/.juju/ssh/juju_id_rsa -r /home/ubuntu/.juju ubuntu@$ADDRESS:~/
juju ssh jenkins/0 "sudo cp -a /home/ubuntu/.juju /var/lib/jenkins/.juju"
juju ssh jenkins/0 "sudo chown jenkins:jenkins -R /var/lib/jenkins/.juju"
juju ssh jenkins/0 "sudo chmod 700 -R /var/lib/jenkins/.juju"
Configure Jenkins
With the prerequisites set up, we need to configure jenkins. Lets start by configuring the gearman connection. Both this and setting up the jenkins jobs are done via the web UI for now. This will change when we fork the charm to allow defining jobs and configuring plugins we need from the charm itself. Find out the jenkins address:
juju status --format oneline jenkins
This should show you the public address of the jenkins nodes deployed:
$ juju status --format oneline jenkins

- jenkins/0: stunning-digestion.maas (started) 8080/tcp
If you've set up the MaaS node as your local resolver, then you should be able to resolve the randomly generated hostname (stunning-digestion.maas in this case). If not, you can resolve it by simply doing:
nslookup stunning-digestion.maas <maas ip>
example:
nslookup stunning-digestion.maas 10.255.251.167
Server:		10.255.251.167
Address:	10.255.251.167#53

Name:	stunning-digestion.maas
Address: 10.255.251.177
Navigate over to http://10.255.251.177:8080 and log in using:
- username: admin (default)
- password: SuperSecretPassword (the one specified in infra.yaml)
Now lets check that jenkins can connect to the gearman server provided by zuul. First we need to get the zuul address:
ubuntu@ubuntu-maas:~$ juju status --format line zuul

- zuul/0: exalted-nerve.maas (started)
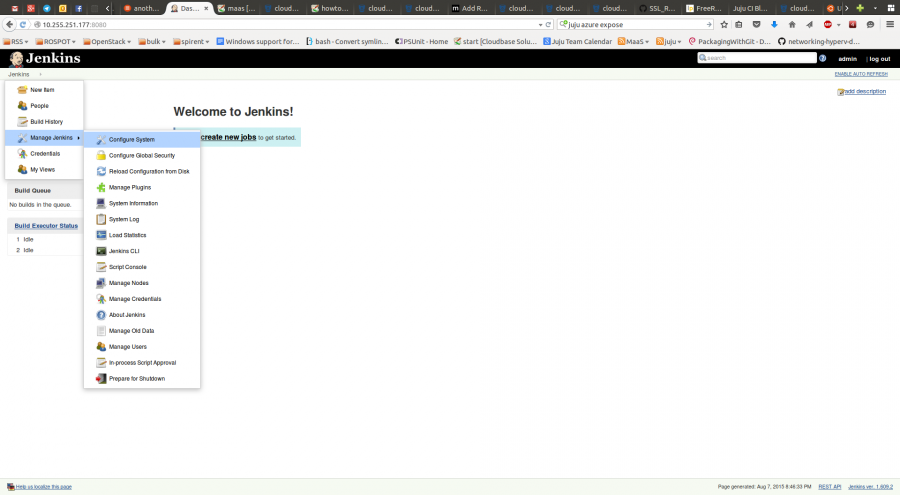
Navigate to the jenkins configuration page:
and search for gearman:
Click on Test connection to make sure jenkins can connect, and save the settings.
Create jenkins job
Time to set up the jenkins jobs.
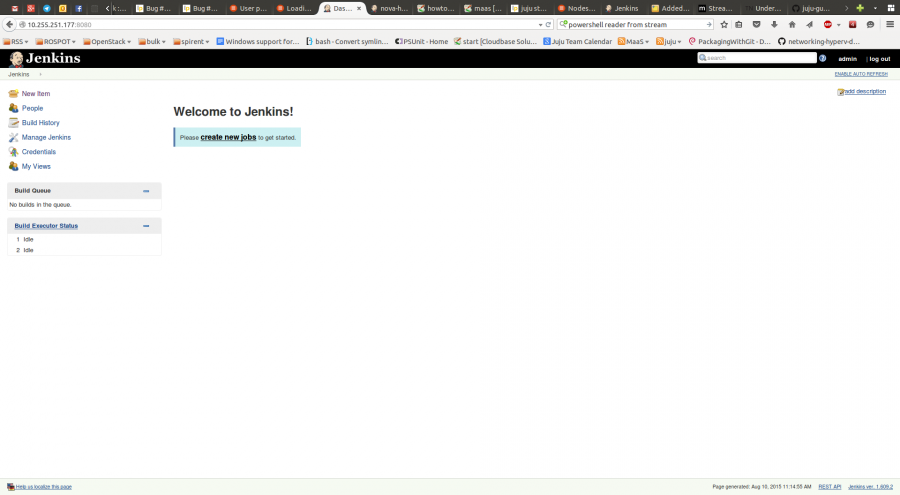
Click on Create new job:
Select Freestyle project and set “nova-hyperv-tempest” as a name:
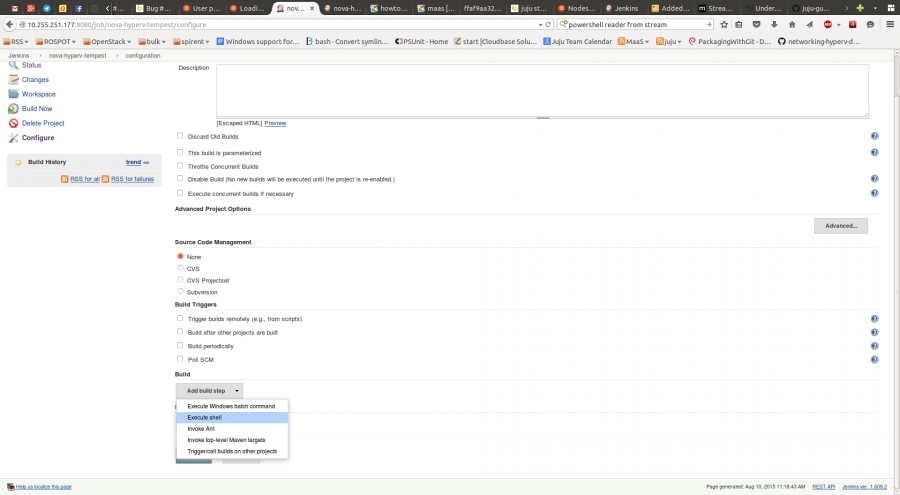
Select Add build step, and select “Execute Shell”:
Add the following content to the job:
#!/bin/bash

function exec_with_retry () {
    local max_retries=$1
    local interval=${2}
    local cmd=${@:3}

    local counter=0
    while [ $counter -lt $max_retries ]; do
        local exit_code=0
        eval $cmd || exit_code=$?
        if [ $exit_code -eq 0 ]; then
            return 0
        fi
        let counter=counter+1

        if [ -n "$interval" ]; then
            sleep $interval
        fi
    done
    return $exit_code
}

set -x
set +e

BUNDLE_LOCATION=$(mktemp)
UUID=$ZUUL_UUID

cat << EOF > $BUNDLE_LOCATION
nova:
  overrides:
    data-port: "space delimited mac address list"
    external-port: "space delimited mac address list"
    zuul-branch: $ZUUL_BRANCH
    zuul-change: "$ZUUL_CHANGE"
    zuul-project: $ZUUL_PROJECT
    zuul-ref: $ZUUL_REF
    zuul-url: $ZUUL_URL
  relations:
  - - devstack-$UUID
    - hyper-v-ci-$UUID
  - - hyper-v-ci-$UUID
    - active-directory
  services:
    active-directory:
      branch: https://github.com/cloudbase/active-directory.git
      charm: local:win2012r2/active-directory
      num_units: 1
      options:
        domain-name: cloudbase.local
        password: Passw0rd
    devstack-$UUID:
      branch: https://github.com/cloudbase/devstack-charm.git
      charm: local:trusty/devstack
      num_units: 1
      options:
        disabled-services: horizon n-novnc n-net n-cpu ceilometer-acompute
        enable-plugin: networking-hyperv|https://github.com/stackforge/networking-hyperv.git
        enabled-services: rabbit mysql key n-api n-crt n-obj n-cond n-sch n-cauth
          neutron q-svc q-agt q-dhcp q-l3 q-meta q-lbaas q-fwaas q-metering q-vpn
          g-api g-reg cinder c-api c-vol c-sch c-bak s-proxy s-object s-container
          s-account heat h-api h-api-cfn h-api-cw h-eng tempest
        extra-packages: build-essential libpython-all-dev python-all python-dev python3-all
          python3.4-dev g++ g++-4.8 pkg-config libvirt-dev
        extra-python-packages: networking-hyperv
        heat-image-url: http://10.255.251.252/Fedora.vhdx
        test-image-url: http://10.255.251.252/cirros.vhdx
        vlan-range: 2500:2550
    hyper-v-ci-$UUID:
      branch: https://github.com/cloudbase/hyperv-charm
      charm: local:win2012hvr2/hyper-v-ci
      num_units: 2
      options:
        download-mirror: http://64.119.130.115/bin
        extra-python-packages: setuptools SQLAlchemy==0.9.8 wmi oslo.i18n==1.7.0 pbr==1.2.0
        git-user-email: hyper-v_ci@microsoft.com
        git-user-name: Hyper-V CI
        pypi-mirror: "space delimited pypi mirrors list"
EOF


export JUJU_REPOSITORY=$HOME/charms
ci-deployer deploy --template $BUNDLE_LOCATION --search-string $UUID
build_exit_code=$?

if [[ $build_exit_code -eq 0 ]]; then
	#run tempest
	source nodes
	project=$(basename $ZUUL_PROJECT)
	exec_with_retry 5 2 ssh -tt -o 'PasswordAuthentication=no' -o 'StrictHostKeyChecking=no' -o 'UserKnownHostsFile=/dev/null' -i ~/.juju/ssh/juju_id_rsa ubuntu@$DEVSTACK "git clone https://github.com/cloudbase/common-ci.git /home/ubuntu/common-ci"
    clone_exit_code=$?
	exec_with_retry 5 2 ssh -tt -o 'PasswordAuthentication=no' -o 'StrictHostKeyChecking=no' -o 'UserKnownHostsFile=/dev/null' -i ~/.juju/ssh/juju_id_rsa ubuntu@$DEVSTACK "git -C /home/ubuntu/common-ci checkout redmondridge"
	checkout_exit_code=$?
	exec_with_retry 5 2 ssh -tt -o 'PasswordAuthentication=no' -o 'StrictHostKeyChecking=no' -o 'UserKnownHostsFile=/dev/null' -i ~/.juju/ssh/juju_id_rsa ubuntu@$DEVSTACK "mkdir -p /home/ubuntu/tempest"
	ssh -tt -o 'PasswordAuthentication=no' -o 'StrictHostKeyChecking=no' -o 'UserKnownHostsFile=/dev/null' -i ~/.juju/ssh/juju_id_rsa ubuntu@$DEVSTACK "/home/ubuntu/common-ci/devstack/bin/run-all-tests.sh --include-file /home/ubuntu/common-ci/devstack/tests/$project/included_tests.txt --exclude-file /home/ubuntu/common-ci/devstack/tests/$project/excluded_tests.txt --isolated-file /home/ubuntu/common-ci/devstack/tests/$project/isolated_tests.txt --tests-dir /opt/stack/tempest --parallel-tests 4 --max-attempts 4"
	tests_exit_code=$?
	exec_with_retry 5 2 ssh -tt -o 'PasswordAuthentication=no' -o 'StrictHostKeyChecking=no' -o 'UserKnownHostsFile=/dev/null' -i ~/.juju/ssh/juju_id_rsa ubuntu@$DEVSTACK "/home/ubuntu/devstack/unstack.sh"
fi

#collect logs form Windows nodes
#collect logs from devstack node
#upload logs to logs server

#destroy charms, services and used nodes.
ci-deployer teardown --search-string $ZUUL_UUID
cleanup_exit_code=$?

if [[ $build_exit_code -ne 0 ]]; then
	echo "CI Error while deploying environment"
	exit 1
fi

if [[ $clone_exit_code -ne 0 ]]; then
	echo "CI Error while cloning the scripts repository"
	exit 1
fi

if [[ $checkout_exit_code -ne 0 ]]; then
	echo "CI Error while checking out the required branch of the scripts repository"
	exit 1
fi

if [[ $tests_exit_code -ne 0 ]]; then
	echo "Tempest tests execution finished with a failure status"
	exit 1
fi

if [[ $cleanup_exit_code -ne 0 ]]; then
	echo "CI Error while cleaning up the testing environment"
	exit 1
fi

exit 0
There are a few things you should remember about this job:
- the VLAN range needs to be computed before the job starts
- the MAC address list needs to be known beforehand.
- the extra python packages should be used only during CI quirkiness (requirements include a bad version of PBR for example).
In this PoC, we have a static list of MAC addresses and VLAN ranges, but this should be queried from a single source of truth (say an API that hosts resources such as VLAN ranges and MAC addresses).
Configuring up Zuul
As mentioned before, this is a manual step that will change once we integrate the jenkins and zuul charms. For now lets make sure layout.yaml is correctly configured. Edit /etc/zuul/layout.yaml and set the following content:
includes:
  - python-file: openstack_functions.py

pipelines:
  - name: check
    description: Newly uploaded patchsets enter this pipeline to be validated. Voting is neutral, only comments with results are sent.
    failure-message: Build failed. For rechecking only on the Hyper-V CI, add a review comment with check hyper-v
    manager: IndependentPipelineManager
    precedence: low
    trigger:
      gerrit:
        - event: patchset-created
        - event: change-restored
        - event: comment-added
          comment_filter: (?i)^(Patch Set [0-9]+:)?( [\w\\+-]*)*(\n\n)?\s*(recheck|reverify|check hyper-v)
    dequeue-on-new-patchset: true

jobs:
  - name: ^.*$
    parameter-function: set_log_url
  - name: nova-hyperv-tempest
    voting: false
  - name: neutron-hyperv-tempest
    voting: false
  - name: check-noop
    voting: false

projects:
  - name: openstack/nova
    check:
      - nova-hyperv-tempest
Save the file and restart zuul:
restart zuul-merger
restart zuul-server
You should be all done (If I have not forgotten anything). Make sure you check zuul logs for patch update status. This will be the likely place to look if you get no jobs in jenkins at all.


